How To Configure KISS Mode Radios
There are several KISS mode radios available on the market today including
older Kenwood TH-D7x models and the more recent BTECH and VGC models. These
types of radio have an inbuilt KISS mode interface which is exposed as a COM
port. This allows WINTNC to connect to the radio, usually via USB or bluetooth,
and send/receive KISS AX25 data packets without the need for an external
hardware TNC or software modem.
I have been provided with a
UV-Pro from BTECH in America and an
NR-V76 from VGC in China. This has allowed me to test the radios with
WINTNC to ensure KISS mode compatibility and to provide end user support
for users to get the radios working with their setup. If you are looking
for a handheld for portable packet operation, I would wholeheartedly
recommend either of these two radios. When I received the BTECH radio,
it appears customs removed the battery in transit to the UK so for our
American friends, I would recommend getting the
UV-Pro but for
elsewhere worldwide, I would recommend the
NR-V76.
These two radios are virtually identical hardware wise but offer
slightly different features in their firmware. However, the KISS mode
interface appears to be identical on both radios.
Before starting to configure the radios to work with WINTNC, you must
ensure the radio is updated to the latest firmware. As of writing, this
is 0.8.1-1. I will not go through the steps to perform this operation as
I assume if you have one of these radios, you will already be familiar
with the BTECH or HT programming apps for your smartphone. The
instructions below are using a UV-Pro on Windows 10 but the setup should
be similar for the NR-V76 and Windows 11.
First Steps
The first step is to enable KISS mode on your radio. This can be
achieved through the phone app or via the radio menu. On the radio, go
to General Settings -> KISS TNC and select Enable KISS TNC. There are
options here to set the TX Delay and TX Tail values. These can be left
alone as they are set when running WINTNC. Default values are 300ms for
TX Delay and 30ms for TX Tail but can be changed in WINTNC if required.
When I
received my radio, on Radio Settings, Tail Elimination was ticked.
Please ensure this is not ticked. On General Settings -> Digital Mode,
check that Enable is ticked. I am not sure if this is needed or not but
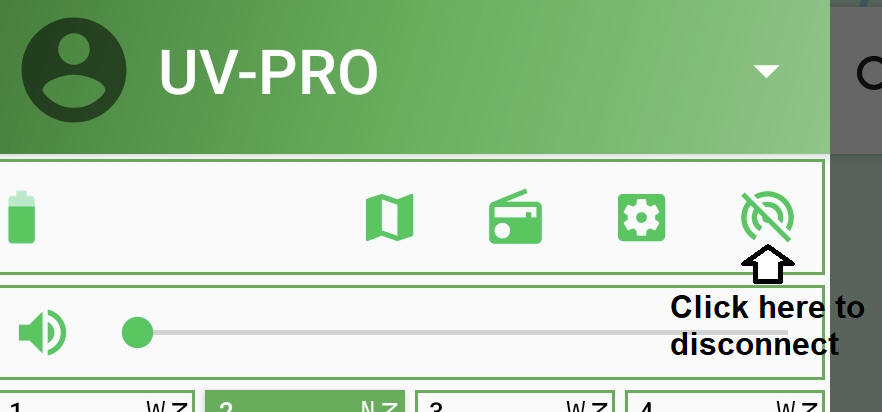
make sure it is ticked anyway. Finally, make sure the phone app is not
connected to your radio. If you are in the app, click the last icon on the
toolbar to disconnect the radio :
Pairing To Computer
These instructions are for Windows 10 but other versions of Windows
will have similar options.
These steps will pair the radio to the computer and create the COM
port necessary for WINTNC to connect to the radio.
On the radio, press the Menu key and scroll down until you see
Pairing and press OK to turn on pairing mode.
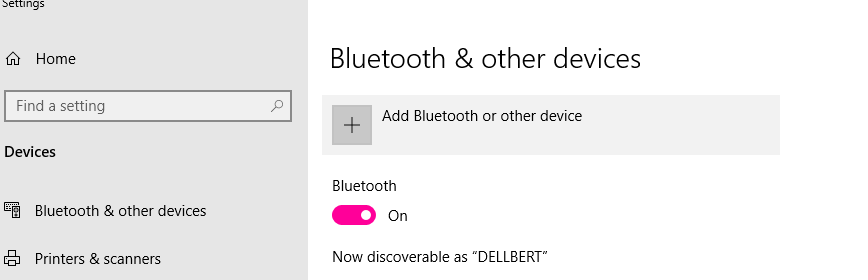
On your computer, go into System Settings and find the Bluetooth and Other
Devices option :
Click Add Bluetooth or other device :
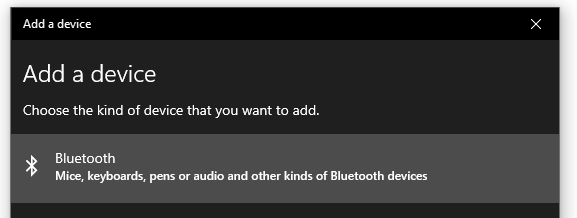
Select Bluetooth :
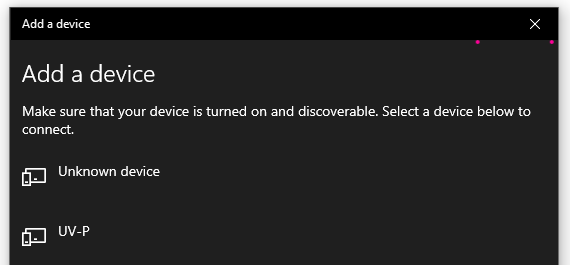
You should see the UV-P option so select it. If you see two devices for your
radio, select the one with the phone icon as above and not the one with the
headset icon.
For the VR-N76, you should see something like :
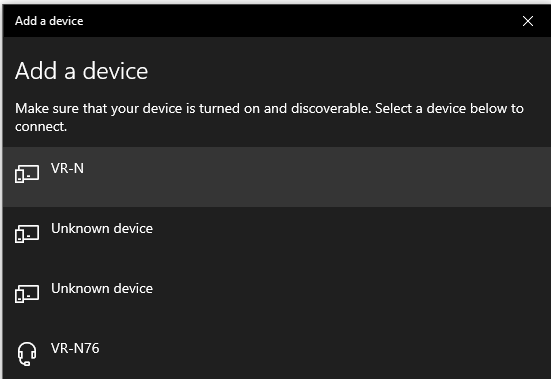
Again, select the VR-N option and not the headset one at the bottom.
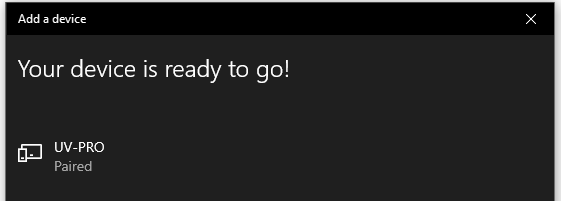
Assuming all goes well, you
should see :
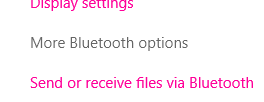
On the right hand side of your screen, select more bluetooth options :
Select the COM Ports tab and you should see the COM port assigned to the
radio. In my case, it was COM20 when pairing the UV-Pro and COM17 when pairing
the VR-N76. You will also see a second COM port for each radio, in this case
COM19 and COM21 but select the one which says 'SPP Dev'.

Once you have got this far and see a COM port above, you are ready to
configure WINTNC to communication with the radio.
If you can't get this far, please
contact me and I
will try and help further.
Configuring WINTNC
Assuming you have already installed WINTNC (if not, go
here), fire up the program.
Press Alt-S for the Setup menu, ensure Port Configuration is selected and
click the OK button. Click the Add button to add a new port and complete as
below :
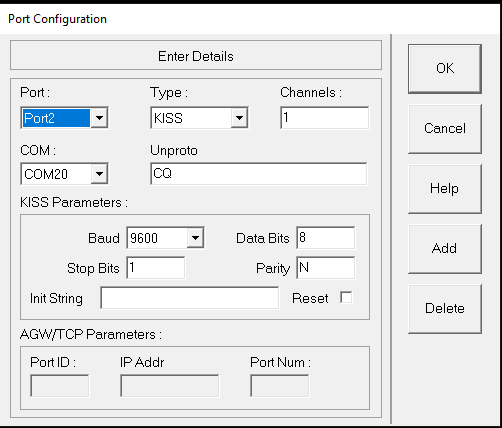
Select the correct COM port for your setup. It is COM20 (or COM17)
for me but will probably be different for you.
Click the OK button, then the Cancel button and the OK button to accept the
exit program message.
Press Alt-X to exit the program and finally re-run the program.
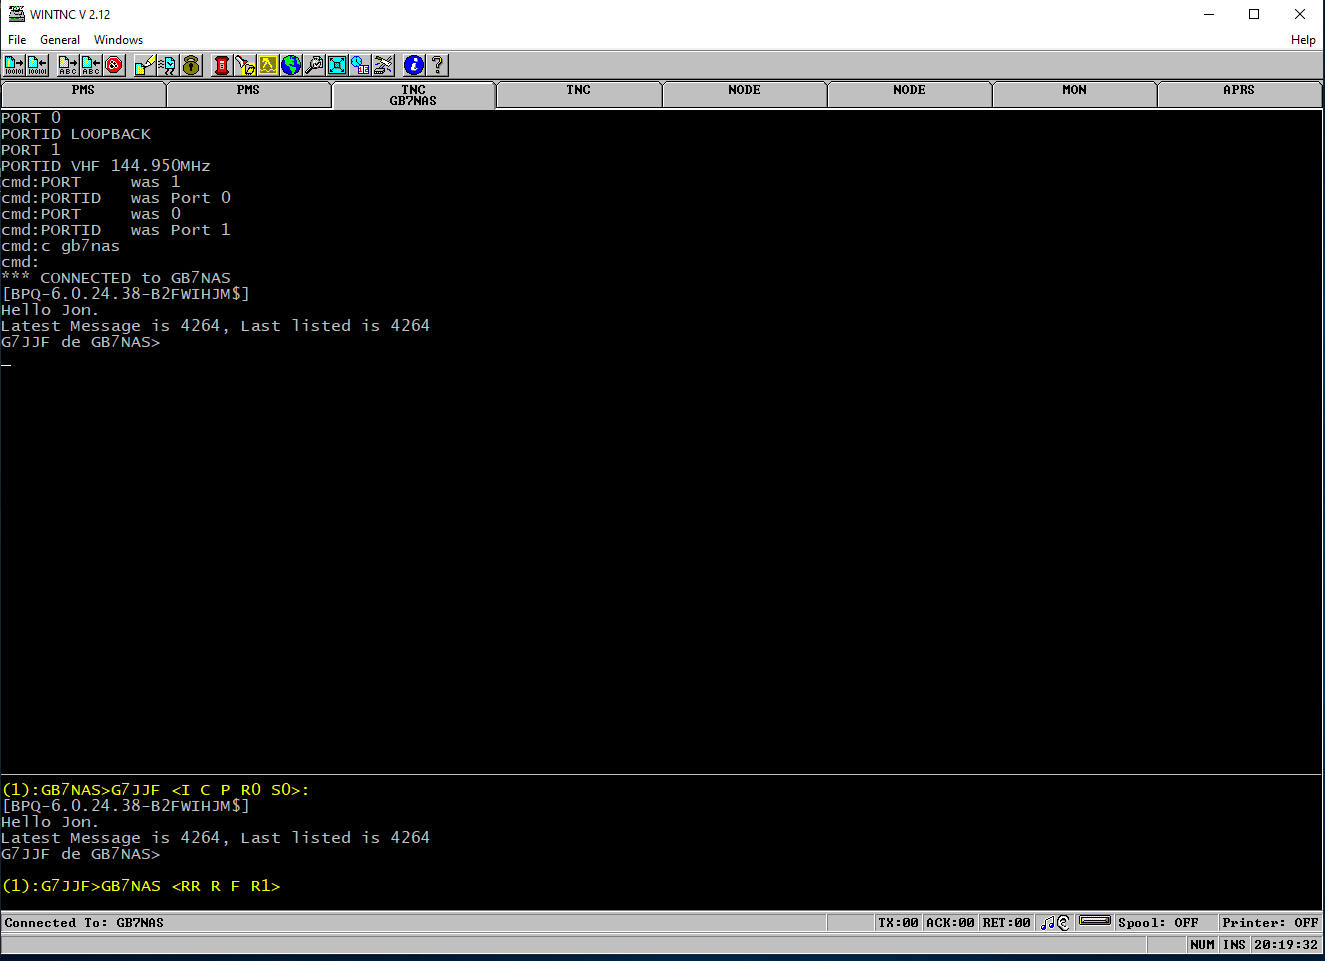
Assuming all went well, you should be able to make a packet connection with
your radio to a local BBS/NODE :
If you get an error similar to the following on startup :
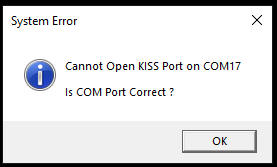
this means that your radio is probably still connected to your phone app so
please disconnect from your phone and try again.
If you get any other issues, please
get in touch and I
will try and help out.
| 